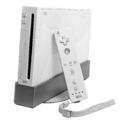
Nintendo Wii

From Repair Wiki
Jump to navigation Jump to search
Problem Potential Solutions
The Picture is Noisy, Bad, Glitching, or Missing Check to make sure the power brick is outputting 12 volts DC. If it is, open the Wii and check the SMD Electrolytic capacitors on the board. The easiest way to check if the video filter SMD capacitor is faulty is to use a composite cable and check the video signal before and after going into the capacitor. Video source: https://youtu.be/sdWmm33VzBM?t=416
No Power
  • Check power brick and make sure it's outputting 12V
  • Check motherboard and make sure 12V is being deliverd to F2
  • Make sure F2 isn't blown
Power/Reset/Eject/Sync Buttons don't repond/have to be pushed hard
  • Clean or replace buttons
SD Card does not read
  • Check FIL43
  • Check continuety between pins CD and CD/WP. When the SD card is inserted, it connects these 2 pins to tell the system that an sd card is inserted. If there is no continuity then the sd card slot is broken. Either run a jumper wire between both pins or replace the slot.
Green light but no audio and black screen / red flash
  • The Wii will turn on and display nothing if either the bluetooth or Wifi board isn't connected or working properly
  • Detach and reattach the bluetooth board.
  • Check connector and pins to make sure they aren't damaged or corroded
  • Replace bluetooth board
  • If this doesn't work, repeat steps for the Wifi board
System can't connect to wifi
  • Check wifi antennas to see if they are unplugged or damaged
  • If the Wifi chip is dead, the Wii will just go to a black screen, so replacing the Wifi board won't be the solution in most cases
  • RVLoader includes Wifi patches, if they were installed previously you can remove them by reinstalling default IOS IOS36, IOS58 and IOS80 from NUS downloader
"An Error Has Occurred..." when entering or exiting system apps (such as Mii Channel)
  • Disc drive isn't connected / completely dead
  • Can also be due to bad Homebrew, try reinstalling default IOS IOS36, IOS58 and IOS80 from NUS downloader
System won't read discs
  • Make sure all the cables are plugged in properly
  • Listen/watch to see if the disc spins
  • Clean debris out of the disc drive
  • If disc doesn't spin, replace spindle motor
  • If laser doesn't move, replace laser motor
  • Adjust the POT on the laser. Measure the POT first. Counterclockwise decrease the resistance and clockwise increases the resistance. The less resistance, the more power the laser has. The more you decrease the resistance, the higher chance the laser has of burning out and burning rings into your discs. Adjust the pot slowly counter clockwise. decrease only about 50 to 100 ohms. If this doesn't fix the laser issue, replace the laser.
  • Replace laser
  • Replace disc drive (for more in depth repairs, refer further down)
Discs have rings burned into them
  • Increase the resistance slowly on the POT. Measure beforehand and aim for adjusting it 50 to 100 ohms. If this causes the laser to not read the disc, replace the laser.
System won't insert/eject discs. System inserts/eject discs slowly
  • Take apart disc drive, clean and inspect for broken components
  • Make sure all the cables are plugged in properly and aren't damaged
  • Replace disc drive
Parental Controls To remove, use this tool https://mkey.eiphax.tech/
Wii Homebrew Issues Go here for support https://wii.guide/ or https://www.reddit.com/r/WiiHacks/

Disc Drive Repair[edit | edit source]

Issue Explanation Possible Repair Actions
Disc does not spin Disk does not spin which prevents the disc from being read Verify disc spin motor is not seized, potentially try a Gamecube disc if your Wii supports it, if not difference please refer to next steps. Verify that you can see the laser move back and forth and that you can also see the red laser. If you do not see the red laser light, replace the laser. If the laser does not move back and forth, replace the laser stepper motor. If you can see both the red laser light and that it moves back and forth, make sure to clean it with isopropyl alcohol and a cotton swap (q-tip,) if still doesn't work, replace laser. Note: A faulty laser can prevent the disc motor from spinning on the software side.
Wii doesn't accept Gamecube discs; does not eject GC discs Gamecube disc does not properly insert and seat in the Wii disc drive This is mostly caused by a bent top disc drive cover, which does not allow the plastic mechanism to revert back to the Gamecube disc size OR the mechanism is seized due to dust, dirt or other debris, clean/replace.
Laser seems to work, but doesn't read Laser visually works, but discs are not read(ie. Laser moves back and forth and visually looks good) Verify laser POT using an ohm meter, 600 ohms is ideal, adjust very slowly, an 1/8th turn can result in increasing a hundred if not more ohms. If laser POT is within 50 ohms of 600 and still doesn't read properly and has been cleaned with isopropyl alcohol (99% preferably) and a cotton swap (q-tip), proceed to replace laser.
Dual-Layer disc doesn't read A dual-layer disc (ie. Super Smash Bros Brawl, or 12 others, does not read) Verify laser POT using an ohm meter, 600 ohms is ideal (especially for dual-layer discs,) adjust very slowly, an 1/8th turn can result in increasing a hundred if not more ohms. Clean laser lens with isopropyl alcohol and a cotton swap (q-tip), if the laser still doesn't read, replace and retest.
Disc Drive shows no signs of life The disc drive does not make any sounds, or signs of life (ie. Disc motor on startup, sounds upon insertion of disc, etc.) Verify power and data connections from Wii to Disc drive are even and connected properly. If connected properly, visually inspect board, look for missing MCC (Monolithic ceramic capacitors,) bent/damaged pins on chips, corrosion, or any other damage, be thorough. If visual inspection comes up fine proceed to replace board, or check continuity on the pins for power/data from Wii to disc drive on your discretion. To replace the board, unscrew the two philips screws holding the board to the disc drive, disconnect the disc motor cable from the board, laser cable and disc insertion sensor cable, desolder the disc insertion motor cables (red and brown), desolder laser stepper motor cables (white, blue, grey, and yellow)-- remember to document correct order when desoldering and proceed to replace in reverse order.
Loud disc drive Disc drive makes loud noises and may not work correctly Disassemble and clean disc drive, look for areas that have moving parts (ie. laser motor or the disc insertion motor and it's connected components.) Issues could be caused by dirt, debris, foreign objects, or lack of lubrication on rails. This may be difficult to diagnose and repair.