
More actions
| IPhone 11 | |
|---|---|
| Manufacturer | Apple |
| Code name | |
| Release date | 2019-09-20 |
| Device type | Phone |
This article is a stub. You can help Repair Wiki grow by expanding it
Guides
Explanatory Guides
| Type | Difficulty | |
|---|---|---|
| IPhone Charging Circuit Diagnostics Guide | ||
| Parts that are serialized on iPhones | Troubleshooting/Diagnostics | |
| Which iPhones Will Boot With Top Board Only | Troubleshooting/Diagnostics | 1. Easy |
Repair Guides
Create a Guide
Device pictures
-
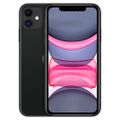
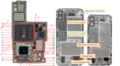
iPhone 11
-
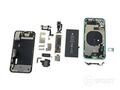
iPhone 11 iFixit teardown.
-


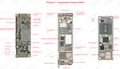
PCB pictures
-
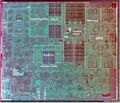
Dieshot of A13 SOC on Base Board PCB
-
Schematic of an iPhone 11
-


Reference measurements (also schematics if available)
-

iPhone 11 - Known Good Mechanic Lightning Readings

More Information/External Sources
You can manually link to external sources for additional information that might not fit here but are useful such as BIOS image dumps, firmware, etc!
Schematics for iPhone 11: https://www.sendspace.com/file/9jgrv0