More actions
| Acer Aspire V3-772g Not turning on but led lights are working repair | |
|---|---|
| Device | Acer Aspire V3-772g |
| Affects part(s) | Motherboard |
| Needs equipment | multimeter, soldering iron, soldering station |
| Difficulty | ◉◉◉◌ Hard |
| Type | Soldering |
Problem description
If your lights are blinking, it indicates that power is present, and the 3.3v supply is operational. However, there is a malfunction in another essential component necessary for your computer to initiate properly.
Symptoms
- Not tuning on
- LEDs are illuminating
Solution
Here are few solutions to try:
Reset the BIOS
Perform a BIOS reset by addressing potential corruption in the system's firmware, responsible for guiding your computer into Windows. This type of corruption, though surprisingly common, can hinder the laptop from understanding the necessary steps to load into Windows.
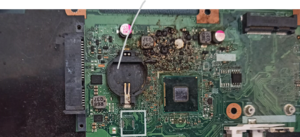
To reset the BIOS, disconnect both the BIOS battery and the main battery. In the provided image, the gray line marks the location of the BIOS battery. Unplug this battery and wait for at least 1 minute. Subsequently, attempt to power on the laptop. If it fails to turn on, proceed to the other solutions.
Replace the RAM
- Faulty memory can cause your laptop to behave this way, if possible check the laptop with known working memory.
Check the Power Button
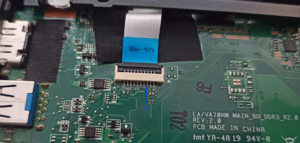
The power button may be broken, use a multimeter to assess pin 3 from the right side, as indicated in blue in figure 2. If you observe 3.3v and notice it dropping to 0 when you press the button, followed by a return to 3.3v when you release the button, it indicates that the power button is functioning correctly.
However, if the power button is not working as expected, short that pin to ground. If the laptop still fails to function after this shorting process, proceed to the next troubleshooting step.
Re-flash the BIOS
If your BIOS is severely corrupted and a reset doesn't resolve the issue, you may need to reprogram it. Follow these steps:
- Find a BIOS.bin file: Search for a BIOS.bin file for your specific model on the internet. For example, Google "Acer Aspire V3-772G BIOS.bin" to locate and download the required file.
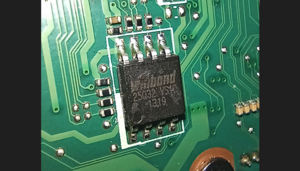
- Identify the BIOS chip: Locate the BIOS chip on your motherboard; it typically looks like the one shown in figure 3. In this case, it is a Winbond 25q32VS chip. Note that some computers may have two BIOS chips. (Winbond is the company name, 25 probably means the physical size, q32 is how big a capacity it has in magabits.)
- Acquire a programmer: Obtain a programmer such as EZP2019+ or CH341a, along with the necessary drivers and software. You can find tutorials on YouTube to guide you through the setup process.
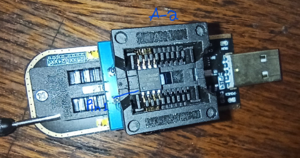
- Prepare for programming: With the programmer ready, use a hot air station to carefully remove the BIOS chip from the motherboard. Figure 4 shows an interface for placing the chip.
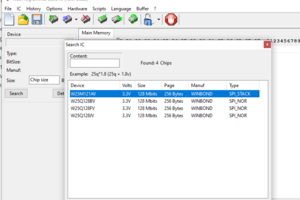
- Software setup: Use software like NeoProgrammer and a CH341a. Follow YouTube tutorials to install the required drivers and software. Use the detect function in NeoProgrammer (Figure 5) to identify your BIOS chip. Ensure all pins make good contact and are in the correct orientation.
- Identify BIOS type: Once detected, the software will ask for the BIOS type. This information can be found in the manual for the BIOS chip, which is available online. Select the appropriate type; if unsure, find a similar BIOS chip and match the specifications.
- Backup the BIOS: Before proceeding, read and save a backup of your current BIOS using the read function (green arrowed chip image).
- Clear and write the BIOS: Next, clear the BIOS chip using the delete function (red X) and then write the new BIOS file using the write function (blue arrow). Note that some BIOS chips cannot be directly overwritten; they need to be cleared first.
By following these steps, you can reprogram the BIOS chip, resolving issues related to severe corruption.
