| GTX 1080Ti Not turning on, no fan spin (1.8V rail issues) Repair | |
|---|---|
| Device | GTX 1070, GTX 1070Ti, GTX 1080, GTX 1080Ti |
| Affects part(s) | Whole board, GPU core |
| Needs equipment | multimeter, soldering iron, soldering station, BGA rework station, thermal camera (optional) |
| Difficulty | |
| Type | |
Problem description
Diagnosing and fixing an issue with GTX 1080Ti showing no display, no fan spin, and no heating on the GPU core. This guide is relevant for issues with 1.8V rail only. If you measure 1.8V on the output of that rail, this guide does not concern your issue.
Symptoms
- GPU does not display anything
- Fans do not spin
- GPU core remains cool to the touch
- Potentially a short on the 1.8V rail
Solution
Diagnostic Steps
- Use a multimeter to check for voltage on the 1.8V rail. If no voltage is present, proceed with the following steps.
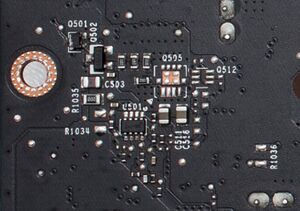
- Check the EN (Enable) signal, which should be above 2V, followed by Vin, which should be 12V. If either of these signals is missing, refer to the schematic and trace the signal to identify the faulty component, usually a resistor.
- Measure VCC voltage, it should be 5V on the VCC pin of the 1.8V controller. If absent, the controller may need replacement since that is an output of from the controller itself.
- If present, ensure that the resistor divider values match those in the schematic.
- Measure the resistance of the 1.8V rail
- If resistance on the 1.8V rail is low or shorted, it often indicates a dead GPU core.
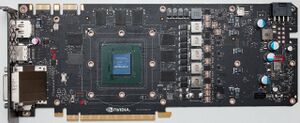
- If it is not the core, start by removing the BIOS chip to check if the short is still present. If so, follow this guide to find the short, likely in the capacitors on the right of figure 2 or the back of the GPU.
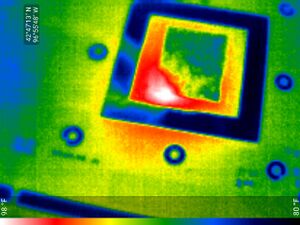
Optionally, use a thermal camera to identify if the GPU core is the source of the short. The 1.8V portion of the GPU core is typically located in the bottom left corner.
Repair Steps
- Upon identifying the shorted component, de-solder it and check if the short is resolved. If so, it is a good idea to replace the buck converter as well.
- After replacing the faulty components, measure 1.8V rail voltage and confirm that it is back to 1.8V.
- Reassemble the GPU and test.
- If the rail is shorted and the source of the short is the core, the only way to repair the card is by replacing the core using a BGA rework station
- This procedure is very costly and difficult, unless you have the tools and parts already, this card is declared unfixable at this point.


