More actions
| NEEWER S101-300W flash charging slow/delay | |
|---|---|
| Device | NEEWER S101-300W PRO |
| Affects part(s) | Electrolytic capacitors |
| Needs equipment | 2.5mm Hex screwdriver, phillips screwdriver, soldering iron |
| Difficulty | ◉◉◌◌ Medium |
| Type | Soldering |
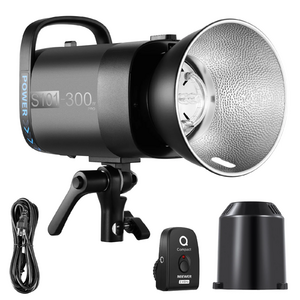
This is a studio monolight strobe flash device, with wireless sync functions (2.4GHz) as advertised by the manufacturer.
Problem description
This device is rated for quick flash recycling times (among 0.4 to 2.5 seconds), but a common issue on these devices involves long recharge times or actually never getting to finish charging the flash.
It may be a design flaw; I've seen two of these devices already with the exact same of its electrolytic capacitors damaged. Said capacitors are rated '''400V 220µF''' and '''105°C'''.
If attempting any repair be extra sure ''the device is disconnected from mains power and make use of appropriate safety gear when disassembling the device", be careful with charged high voltage capacitors.
The disassembling process would require a hex 2.5mm screwdriver for the 4 outer screws, and the rest are phillip screws.

Symptoms
- Flash shot takes too long to charge (above 3 seconds)
- Flash shot never becomes ready
Solution
Replace one or more bad capacitors inside the device.
Diagnostic Steps
Turn on the device and measure the amount of time it takes to charge the flash after shooting. By the specification and advertising of the manufacturer, flash charge times should be around 0.1s and 1.8s, so anything above 2 or 3 seconds may be an indicator of a faulty capacitor. As well, if the capacitor in question has gone bad and splashed its contents inside the device, a subtle but distinguishable smell may be picked up through the fan exhaust.
Repair Steps
Disassemble the device down to the power board assembly (this device uses a fragile lamp in its front, so be gentle when unscrewing around it, go slowly...), unscrew to free it from the logic board, make sure capacitors are discharged, otherwise discharge carefully with an adequate resistor. Locate the pair of capacitors which are smaller in size, usually are closer to the power connections, on of them should show signs of damage, be it an obvious exploded capacitor with its contents splashed around, or a slightly bulged capacitor that may or may not display a crack on its top surface. Clean up the area if the damaged capacitor splashed its electrolyte content around.
Proceed to desolder the damaged capacitor leads in order to remove it, it may be kept in place by some glue on its bottom, so use a strong prying tool to help you (make sure you discharge the capacitors beforehand). Having removed the capacitor, replace with another 400V 220µF electrolytic capacitor of high temperature tolerance (good quality 105°C or better is recommended). Make sure not putting it in the wrong orientation or it may exploded upon the device powering on...
Re assemble the device up to having all the connections in place and test the repair, the new capacitor should allow the device to charge its flash shot in less than 2 seconds (as per manufacturer's rating). If everything's fine then finish the reassembling.
Although the spare capacitor is of good quality and it has been properly replaced, the device may damaged the capacitor in a relatively short time of usage if not used lightly. This may be a design flaw, so being wiser one could consider replacing with differently rated capacitors that may stand a better chance through normal and heavy usage of this device.
